Installing soSIMPLE Calendar
1. Make sure your FileMaker Server is deployed with PHP
All versions of FileMaker Server 12 and above work with soSIMPLE Calendar Settings.
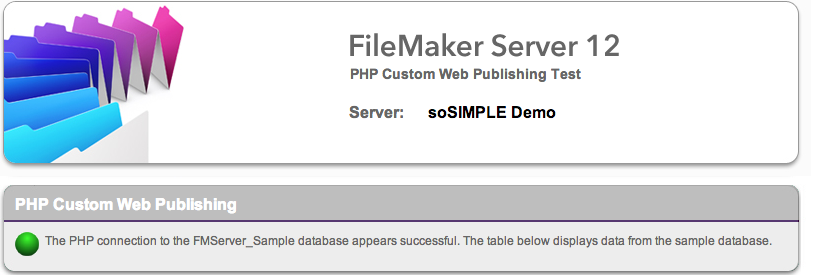
Verify you’re set up for PHP by going to the FileMaker Server Technology Test page (choose “Open Test Page” from the Server menu in the Admin Console) and clicking “Test PHP Custom Web Publishing”. If the PHP test passes, you’re done with this step. If not, make sure you have installed the original sample database that was installed with FileMaker Server and redeploy FileMaker Server. You can generally do this while FileMaker Server is hosting clients.
-
-
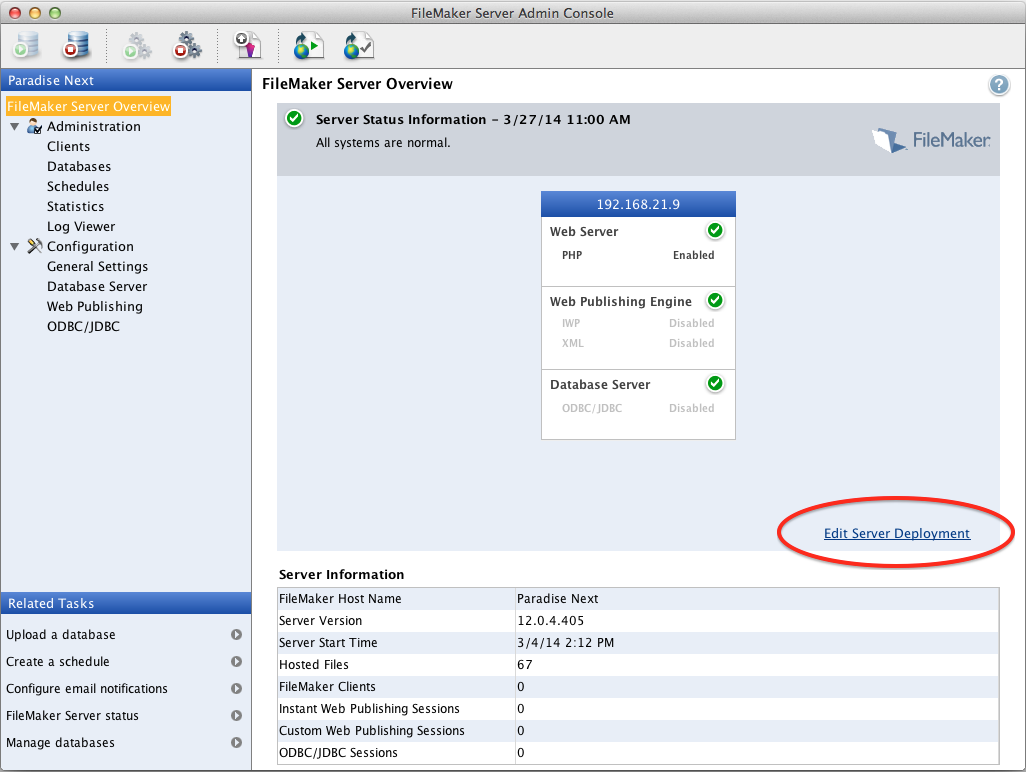
- FileMaker Server 12: Click “Edit Server Deployment” link in the lower right of the overview screen.
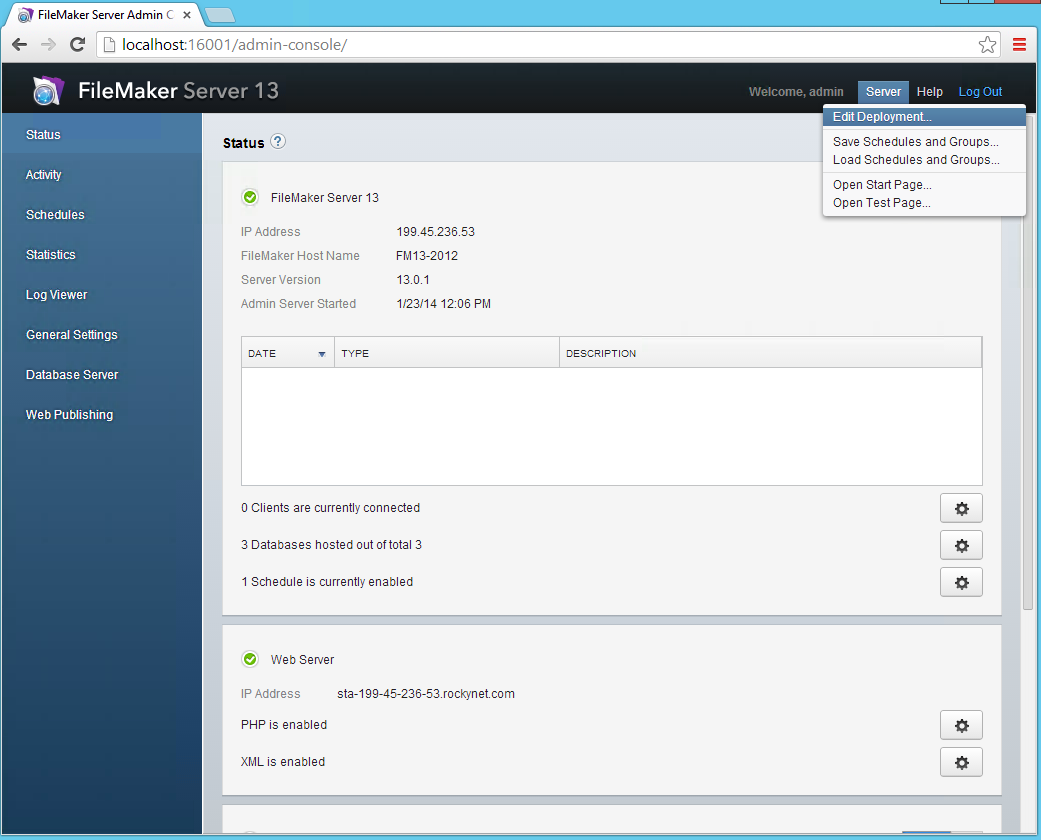
- FileMaker Server 13 – 16: Choose “Edit Deployment” from Server menu in the upper right of the Admin Console
- FileMaker Server 17 and above: manually enable PHP using the command line on your server. Type in the following and restart your server processes.
fmsadmin set cwpconfig enablephp=true
-
2. Put the soSIMPLE folder into your web folder
Where you put this folder will depend upon your Server Operating System, and your version of FileMaker Server.
If you are using a multi-server configuration, put this folder in your hosted web server folder and make the following change to the file config.php: Change the line that says “host” to reflect the IP address of your FileMaker Server.
If you are using a single-server configuration, put your folder in your hosted web server folder. No files changes are required:
-
-
- Filemaker 13 and above, Windows: c:\Program Files\FileMaker\FileMaker Server\HTTPServer\Conf
- FileMaker 13 and above, Mac: /Library/FileMaker Server/HTTPServer/htdocs (note: if you’re using ssl and https:// use the path /Library/FileMaker Server/HTTPServer/htdocs/httpsRoot)
-
-
-
- FileMaker 12, Windows: default installation is c:inetpub\wwwroot
- FileMaker 12, Mac 10.8 and before: /Library/WebServer/Documents
- FileMaker 12, Mac 10.9: /Library/Server/Web/Data/Sites/Default
-
IMPORTANT NOTE: These are the manufacturer default web server locations. The web server locations may vary depending on many factors, including having upgraded from previous versions of the OS, so double check with your server documentation, IT administrator, or IIS/Apache configuration files.
Finally, you should make the “Cache” folder in the soSIMPLE folder writable by your web service:
Windows: Right-click the Cache folder, choose Properties, then Security, then:
Mac: Click the Cache folder, choose “Get Info” from the File menu and hold the “option” key while you click “+” to:
Verify your installation by opening your browser on the web hosting computer to: http://localhost/sosimple/sosimple_cal.php
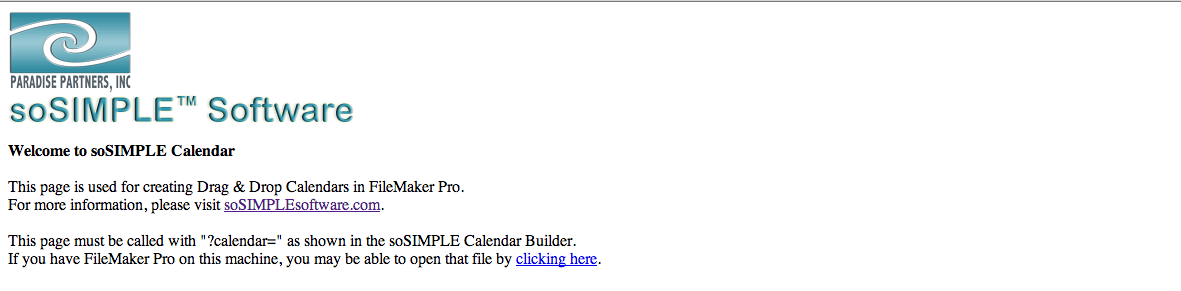
You should see a welcome message from soSIMPLE Software. You can also test your cache from this page. The sample calendar won’t work yet, until you’ve finished the next step.
3. Upload the two files, soSIMPLE Calendar Settings.fmp12 and My Calendar Solution.fm12 to your FileMaker Server.
soSIMPLE Calendar Settings is where you go to configure your Calendar. It also hosts the necessary code for the calendar.
My Calendar Solution is a fully implemented calendar solution. If you are integrating your own calendar, you can remove this file after you’ve finished testing your installation.
How to upload to FileMaker Server 12 or FileMaker Server 13 and above
4. Open soSIMPLE Calendar Settings using “Open Remote…” from this server or another server
5. Turn on Server-Powered settings
Click the gear icon to open soSIMPLE Calendar Preferences.
Uncheck the box that says “Always use Standalone mode”.
Click “Use Default” to set the URL field to the path to your PHP page. If you are using multiple servers for hosting, this field must be changed to point to the file on your web server (see multiple hosts). Test the URL in this field by opening it in a browser, or clicking the “Clear Cached Files” button.
6 Make sure the sample calendars work properly. Set up your own calendar.
soSIMPLE was designed to provide an easy way to create and deploy good-looking calendars for your solutions.
To get started, click the “New Calendar” button in soSIMPLE Calendar Settings. This will walk you the few short steps to add a calendar to your solution.
Once you’ve set up your first calendar, you’ll find endless variations and options you can add to your calendar. We suggest starting off small and adding features as you get comfortable with soSIMPLE Calendar Settings.
Next step: 5-minute integration
